- Integrations
- Functions
- Resource
- Policy
How to Create Shopify Store in 2024?--Step by Step Guide
 By Vikta19 Dec,2024
Shopify is a fully customizable ecommerce platform that allows brands to create their own online storefronts. With Shopify, you can sell your product online, as you do in other e-commerce marketplaces, without content limitations or high fees.
You may have heard the old saying, "Don't put all your eggs in one basket." While selling on Amazon is an incredible way to bring your product to millions of potential customers, as your business grows, you should diversify your brand's presence online.It means listing your product on other ecommerce marketplaces, such as Walmart Marketplace, eBay or even Facebook Marketplace. But it should also include creating your own e-commerce store on a platform like Shopify, because it gives you complete control over your brand and builds legitimacy around it.
Want to know how to start a Shopify store and gain more than $120 billion sales within one year? This step-by-step guide will help you do just that by explaining in detail how to build your e-store from the ground up.
Well, let's begin!
Why Choose Shopify?
Advantage of Shopify
- Easy to set up: It is easy and convenient to set up an Shopify account and beautify your storefront it is user-friendy platform and customized templates make the process straightforward, even for the technologically unsavvy.
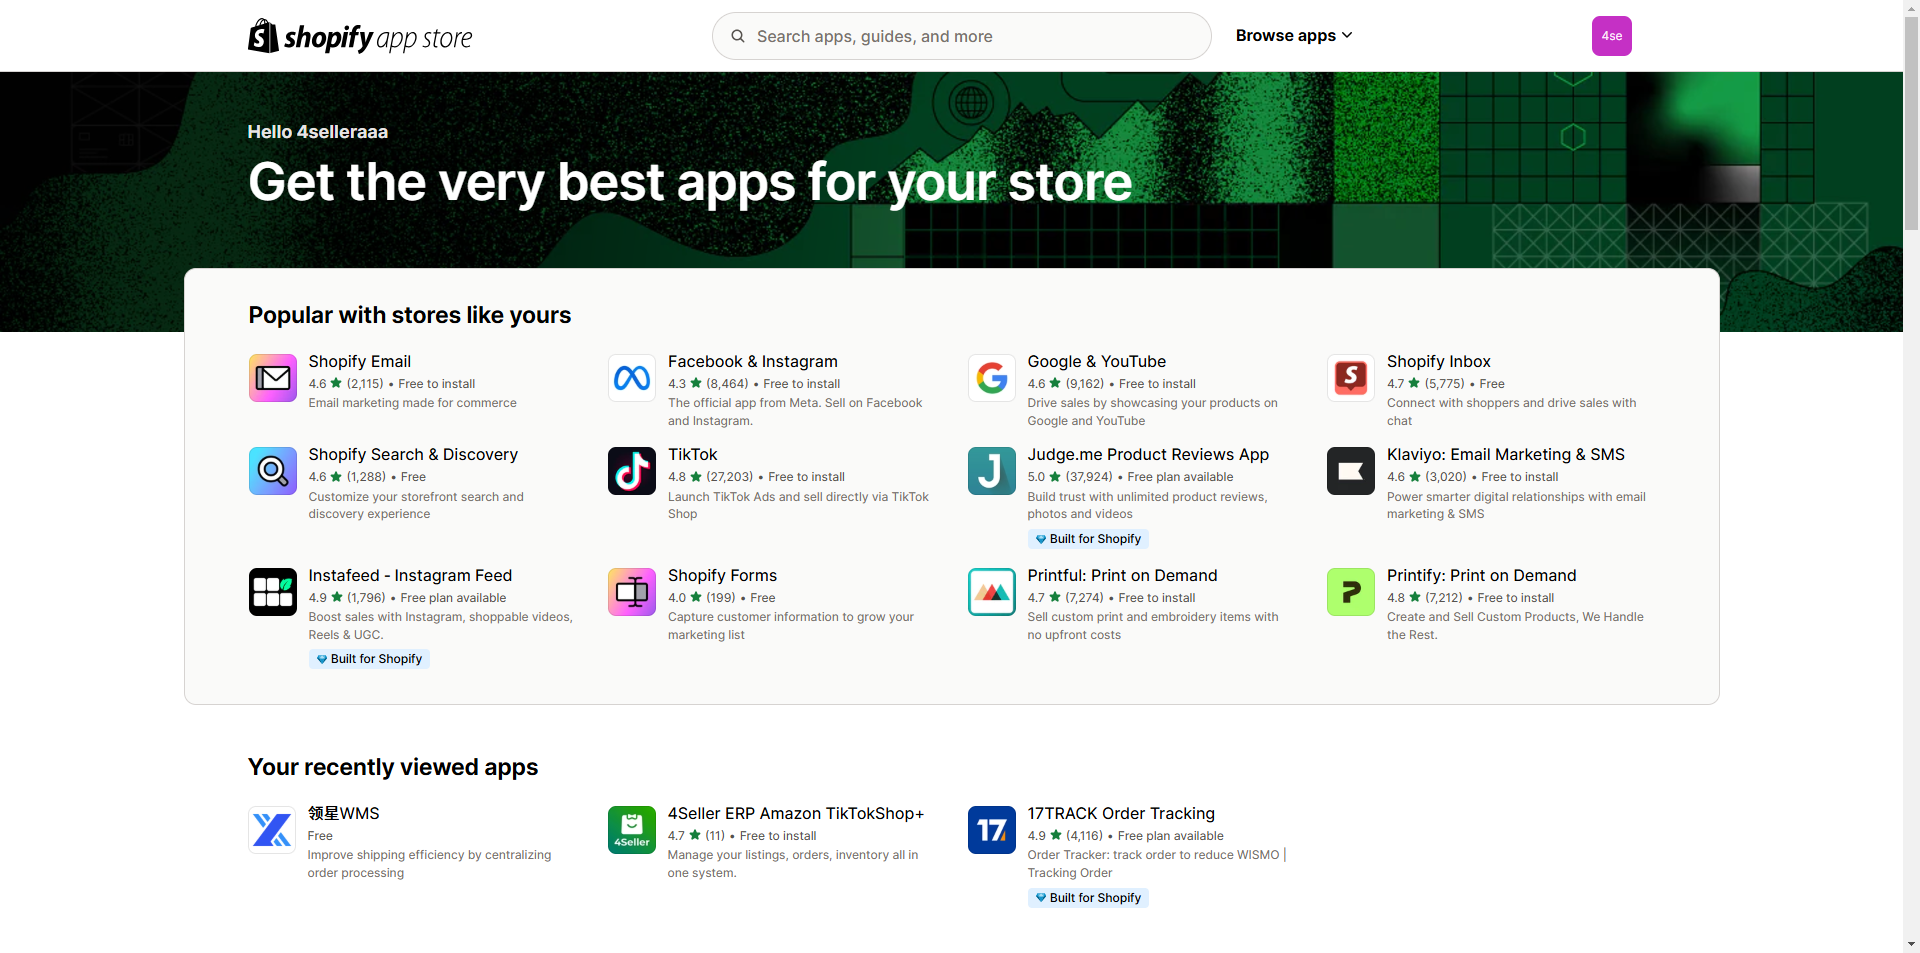
- App Store: Shopify also has an app store, where users can browse apps that add functionality to their storefront. There’s an app for practically anything, from order integration to sale countdown timers to product bundling tools,like 4Seller.
- Customizable themes: Unlike Amazon and similar marketplaces, you can customize your store to evoke the unique look and feel of your digital brand experience. With Shopify, you can add any number of picture and text fields to your unique structure to immerse visitors in your brand's world.
- 24/7 Support: If you have any questions or concerns about the Shopify store, you can contact their 24/7 support team via live chat or email. Shopify's support center offer faster response times and help sellers quickly.
- Support Full Control: When you sell on marketplaces such as Amazon or Tiktok, you must comply with their strict terms of service or risk losing your account. When you sell on Shopify, you can complete control.
Shopify Retailer Statistics
In 2023, the Gross Merchandise Volume(GMV) for products sold through Shopify was $235.9 billion, up 19.6% from 2022. According to statistics, there are more than 2.4 million independent sellers on Shopify,the total value of sales made is approximately $1 trillion.During Black Friday and Cyber Monday 2023, Shopify merchants collectively made $9.3 billion in sales, there are 609 Shopify web stores with an estimated $1 million or more in sales revenue. Over 656,400 or 27.3% of Shopify online stores sell less than ten products. As we know, 43 B2B companies currently use the Shopify platform.
Shopify Conversion Rate Statistics
The average conversion rate for Shopify stores is 1.4%.- 1.2% is the average mobile conversion rate for Shopify; 20% higher than the average mobile conversion rate for all websites.
- On desktop, the average Shopify conversion rate is 1.9%, 58.3% higher than when customers shop on mobile devices.
- The top 20% of Shopify stores have an average add-to-cart rate of 7.5%.
- 45.2% is the average checkout completion rate for Shopify e-commerce websites.
How does Shopify work for begineers?
Shopify is a great option for beginners. It is an easy-to-use eCommerce platform that allows beginners to create their own online store. Anyone can use it to upload products, create websites, process payments and manage inventory. It has a lot of advanced features, but the fact that you can quickly build a store and then get into weeds.Who Should Sell on Shopify?
Creating a Shopify store is a good idea for anyone looking to start their ecommerce journey or expand on an existing brand they already have in another marketplace.
Shopify's themes supports entrepreneurs of all types, including Dropshipers, own-brand Amazon sellers, eBay secondhand sellers, craftsmen or brick-and-mortar brand owners looking to move their business online.
What You can Sell on Shopify?
Shopify allows sell (almost) anything on your own eCommerce website. It's most commonly used by businesses that sell physical products—think cosmetics, furniture, or apparel. if you want to list products quickly and easily to sell hot selling products in your own shopify store, 4Seller Scrape Tool will help a lot! 4Seller supports Single scraping or Bulk Scraping of products from TikTok, Amazon, eBay, SHEIN, Temu, CJdropshipping, AliExpress, Alibaba and Walmart platforms to TikTok & Temu & Shopify stores. You need to download 4Seller's Product Scraper extension first, and then enter the product details page. 4Seller's Product Scraper extension will automatically prompt you to scrape product, which will help you publish products in short time!One particularly compelling part about Shopify is that it also supports dropshipping. This type of eCommerce means you don't touch the products you're selling. Instead, you integrate your backend with a dropshipping company who will pick, pack, and ship orders to your customers whenever they're placed through your Shopify website—no intervention required on your part.
How to create Shopify Store?
Step 1: Create your Shopify Account
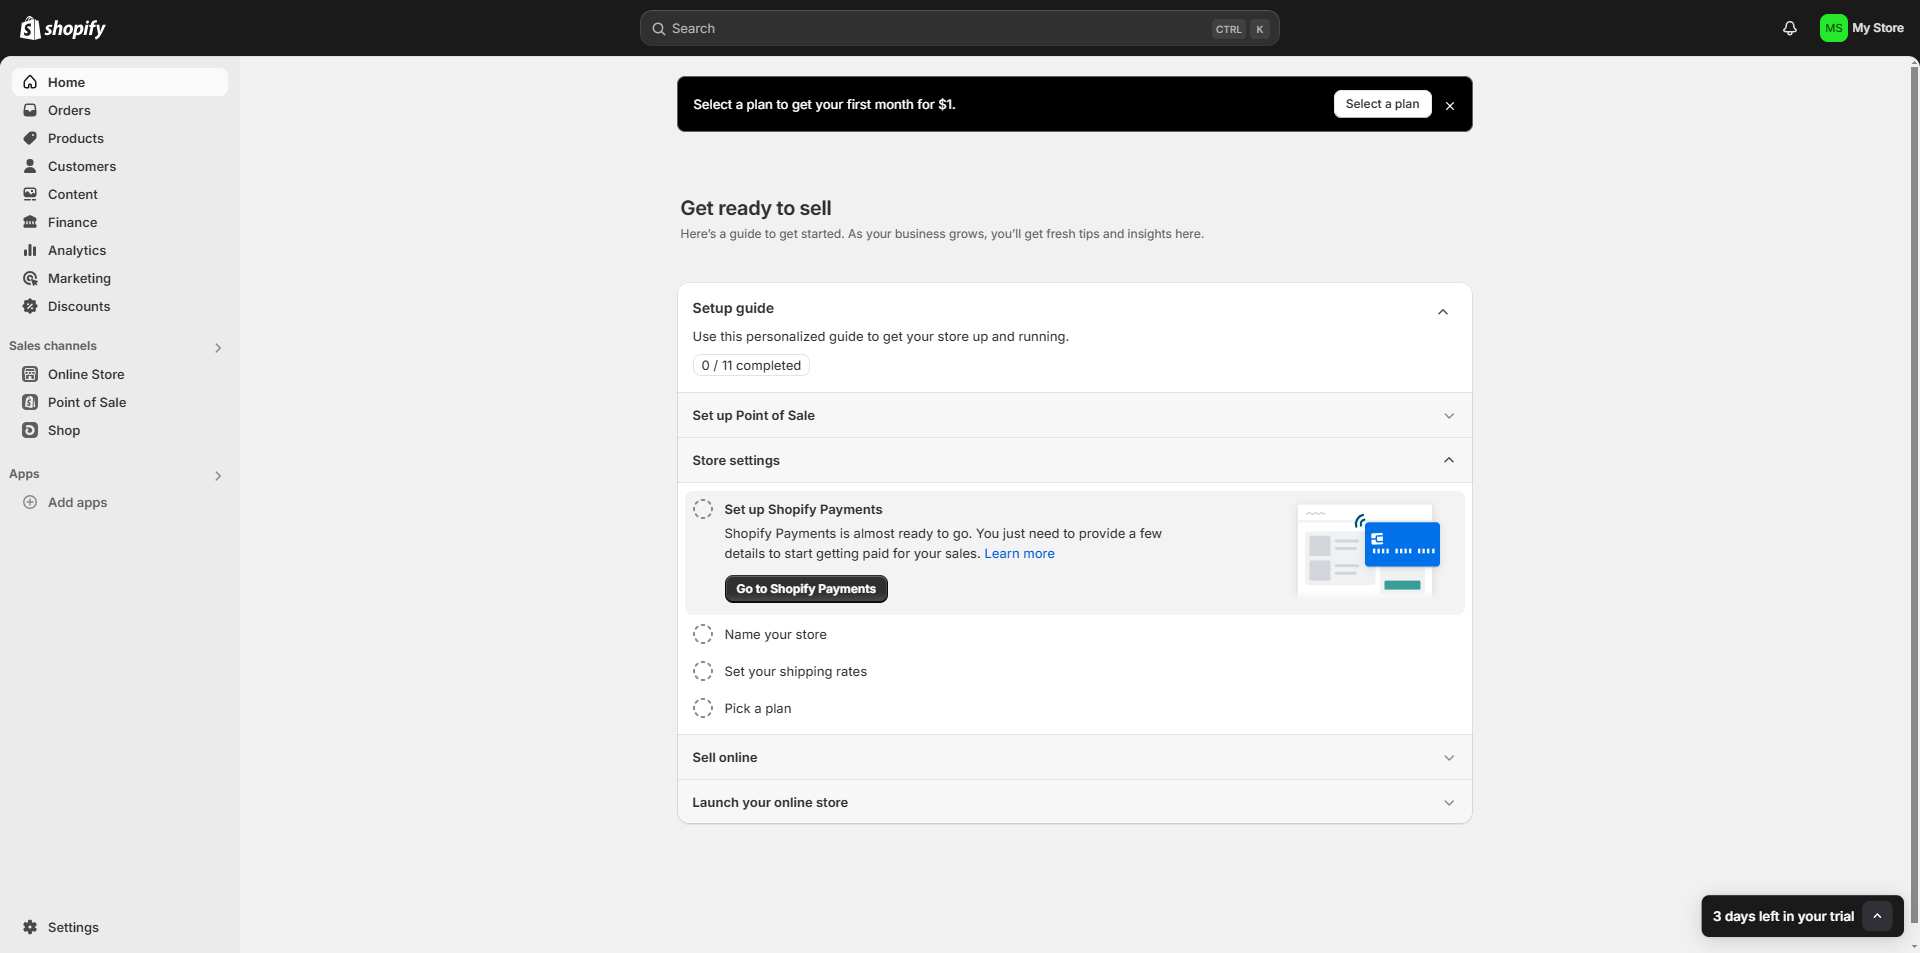
The first step in opening a Shopify store is to create a free account. Shopify will ask for some basic information to set up your account. Visit Shopify.com, enter your email, and click on “Start free trial.”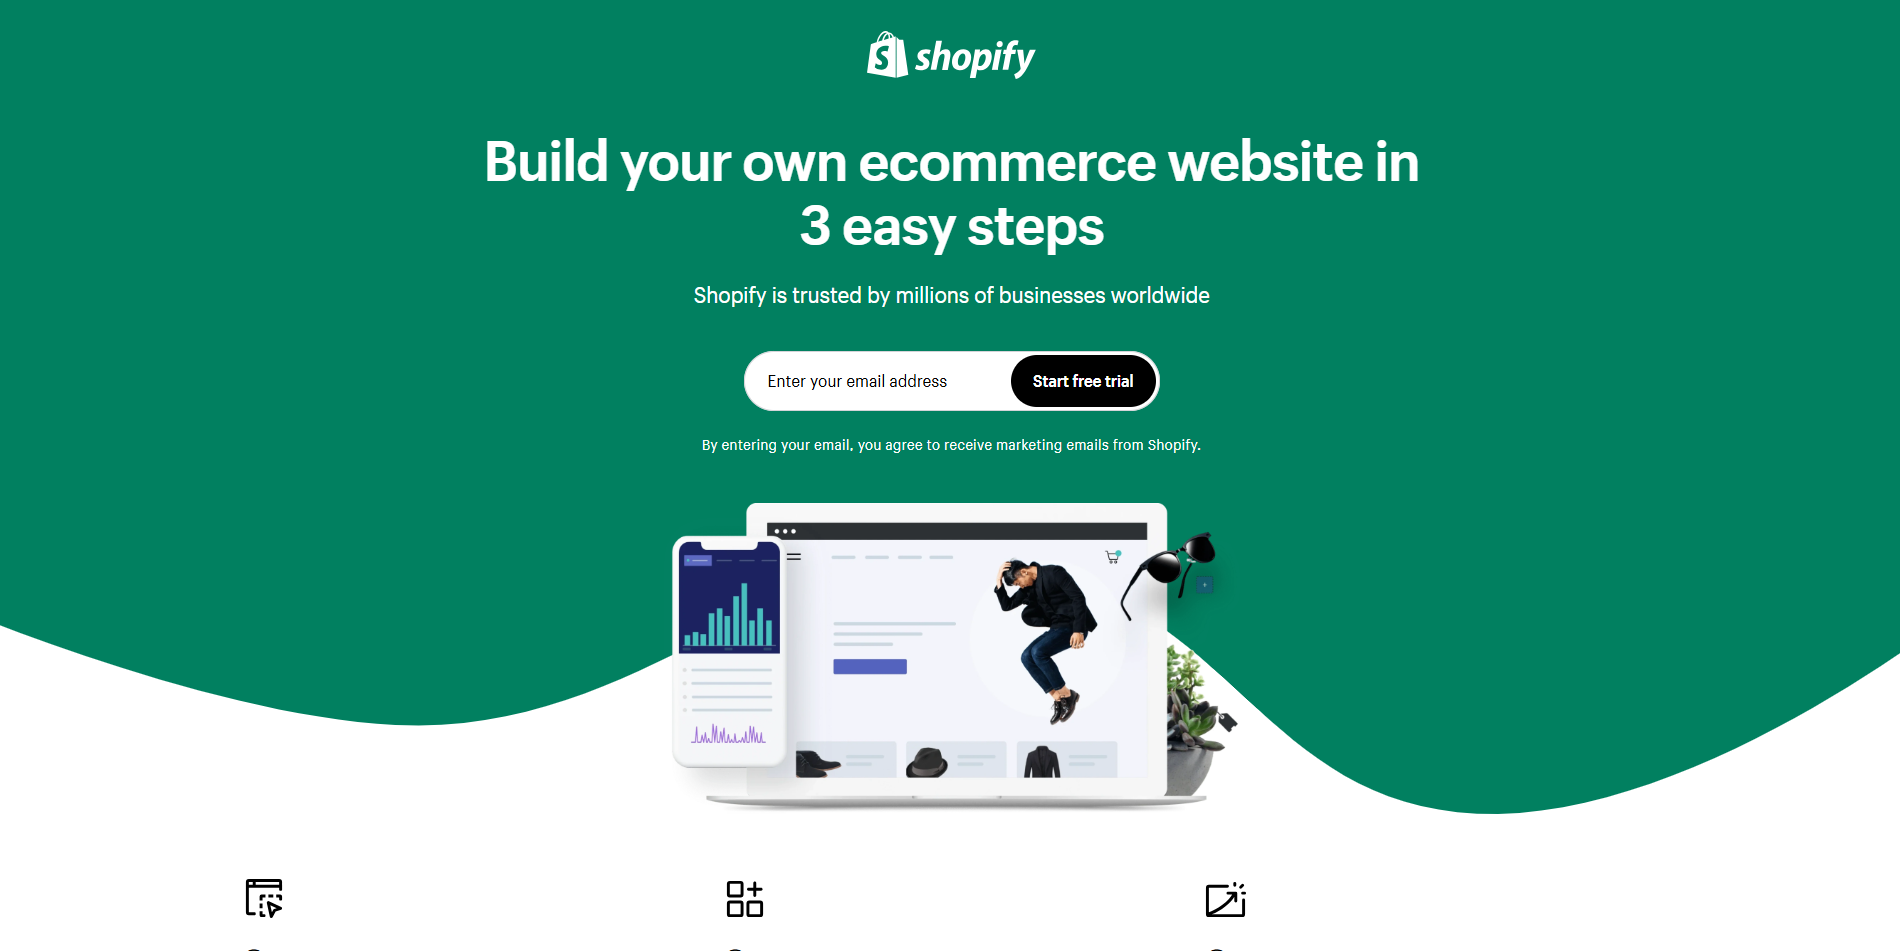
Next, you will be presented with a series of questions, each with the premade answer choices. You have the option to skip them entirely or select the answers that best match your preferences and business needs.

After that, you can create your Shopify ID.

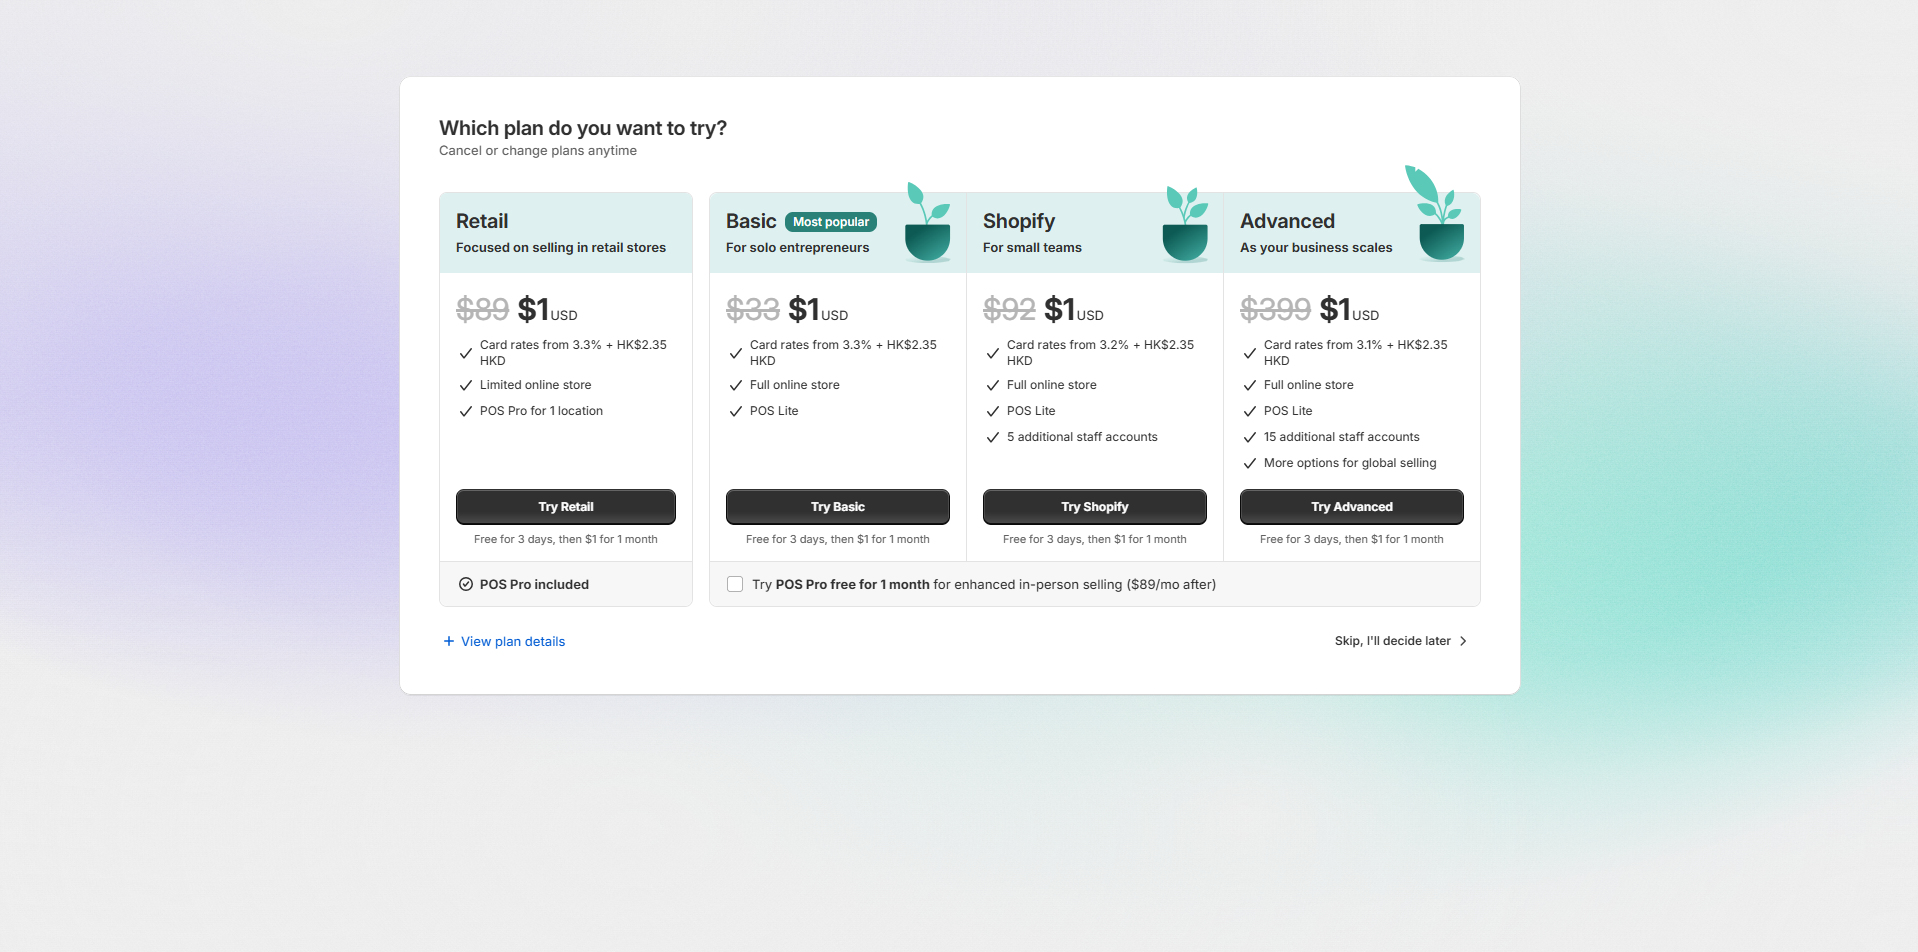
Then, Your trial will start, and you will be taken to your new store where you will set everything up. To get to this point, you do not need to enter any credit card information. If you would like to Shopify up on their $1/month offer, you will need to choose a plan. For now, get your store set up.
Now that you're on the homepage of your store, look around and become familiar with the platform. Before adding any product or customization, we recommend removing all the boring stuff:
- Naming your store
- Connecting a domain
- Setting up payments
- Setting up your shipping settings
Step 2: Add a Domain Name
Domain name are what customers type into their browsers to find your store. Examples include Amazon.com, Shopify.com, 4Seller.com and more. If you already have your own brand, turn your domain name into your brand. Click "Add domain in the Shopify dashboard.

You have a few options below:
- You can keep the current "myshopify domain"currently available to you. Such as 91m7sg-ek.myshopify.com. This is not recommended because it does not look as professional as an domain without myshopify.
- Connect existing domains that you already own.
- Transfer the domain you already own from your current registrar-making Shopify the "host" of the domain.
- Buy a new domain from Shopify.
Sometimes, you may find that your first domain name has already been used-but never mind! You just have to be creative. If you need to connect or transfer your domain, Shopify will guide you through the necessary steps to do so. It's a complicated process, so be patient! Each domain registrar (Bluehost, GoDaddy, HostGator, etc.) has different requirements, so your exact steps may vary. In this section, assume you don't have a domain yet, and then buy a new one. Click "Buy New Domain."
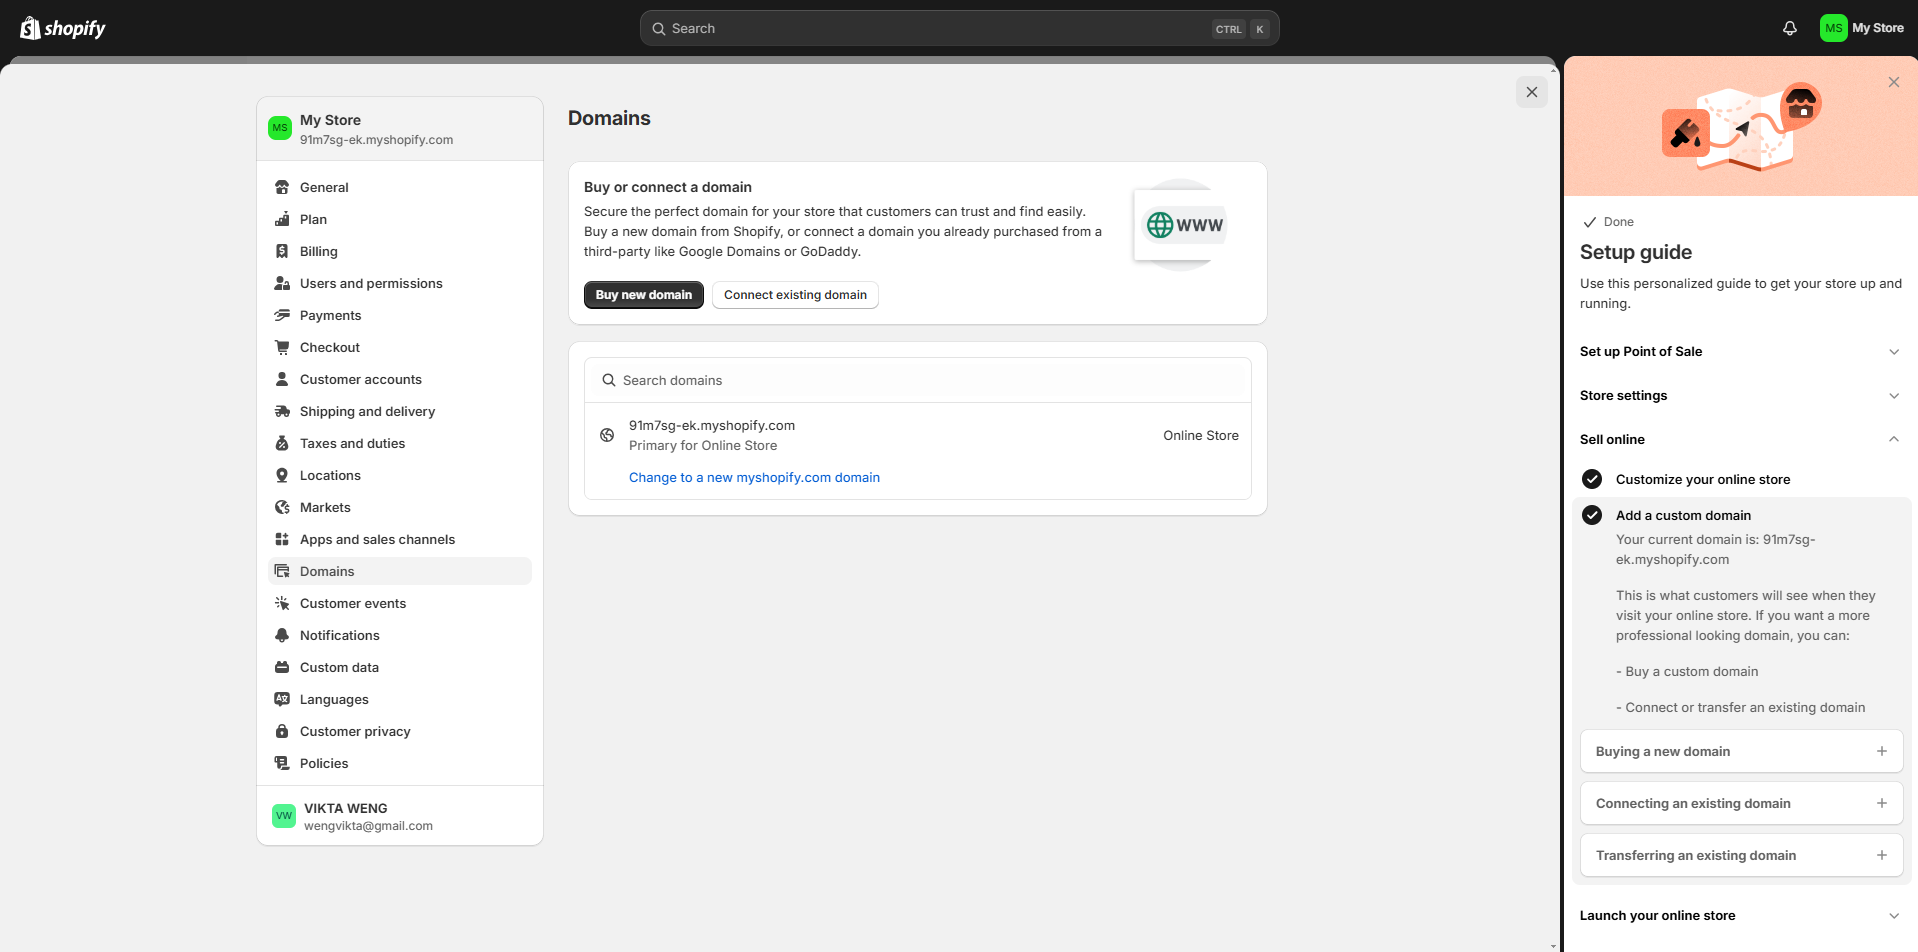
After that, enter the domain you want to purchase for your store.
Some tips on domain name:
- Be brief: If You want your customers to remember your URL easily. There's a good chance no one will remember something like "superrniceclothingstore.net", so make it "SNclothing.com" instead.
- Easy to spell: Avoid repeating adjacent letters, such as the two r in "superrnice" in the example above.
- Using a .com address: Shopify will recommend .net or .org options, but .com extensions is the easiest to remember
Next, you will be prompted to enter payment information before moving forward. After entering the payment information, view the domain order summary and click "Buy Domain."
Now, you'll have your own store-specific website name!
Step 3: Complete Payment and Account Setup
You need to set up your method of getting paid for your shopify store orders. On the homepage, Cick "Payment" to set up.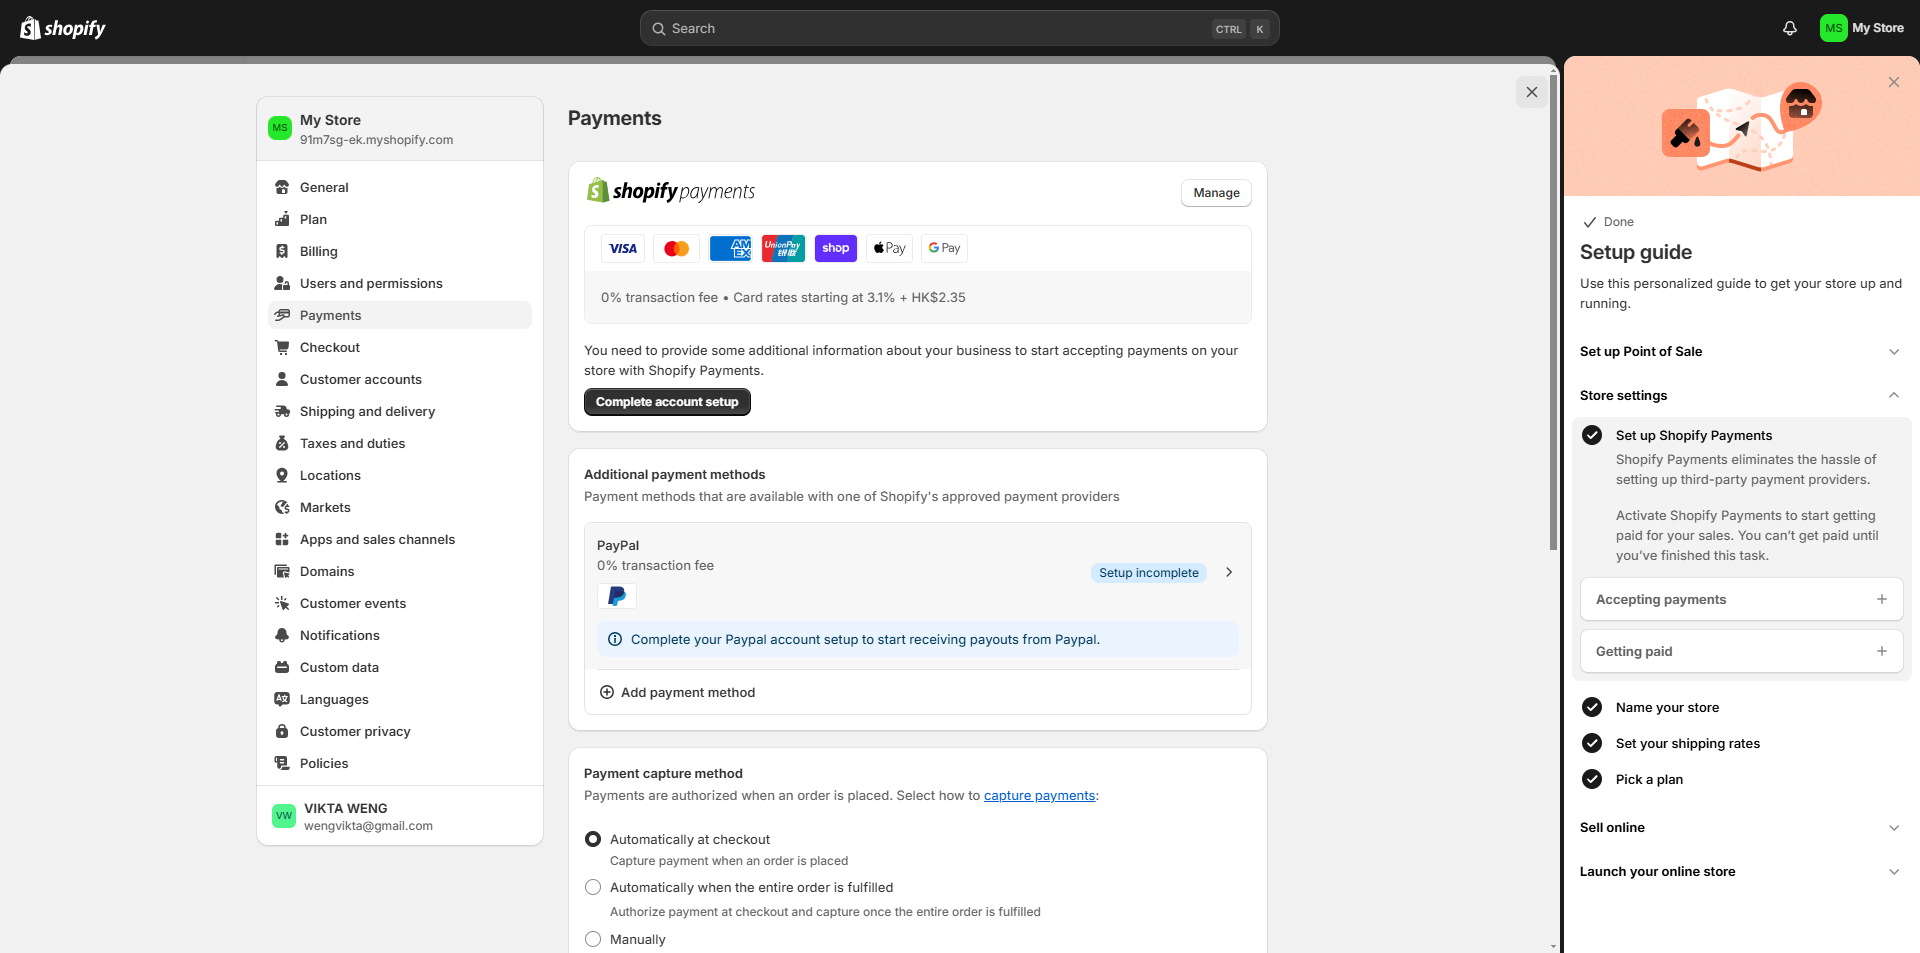
There are a few ways you can accept payment on your website: Shopify Payments, Paypal Express Payments, Apple Pay, or another third-party provider that you can choose from in Shopify. You can offer multiple payment options for your customers' convenience. Once you' ve picked your payment methods, click on "Activate Shopify Payments."
This is where you will enter your business details such as EIN, business type, address, SSN, customer billing statement, and banking information. Fill in all of the required fields so you can ensure you are paid correctly. If you wish, set up your Paypal and Amazon Pay payment options. We recommend at least setting up Paypal Payments, as it gives customers a recognizably secure payment option.

After you complete these steps, your store will be set to accept payments!

Step 4: Set up Sales Tax Collection
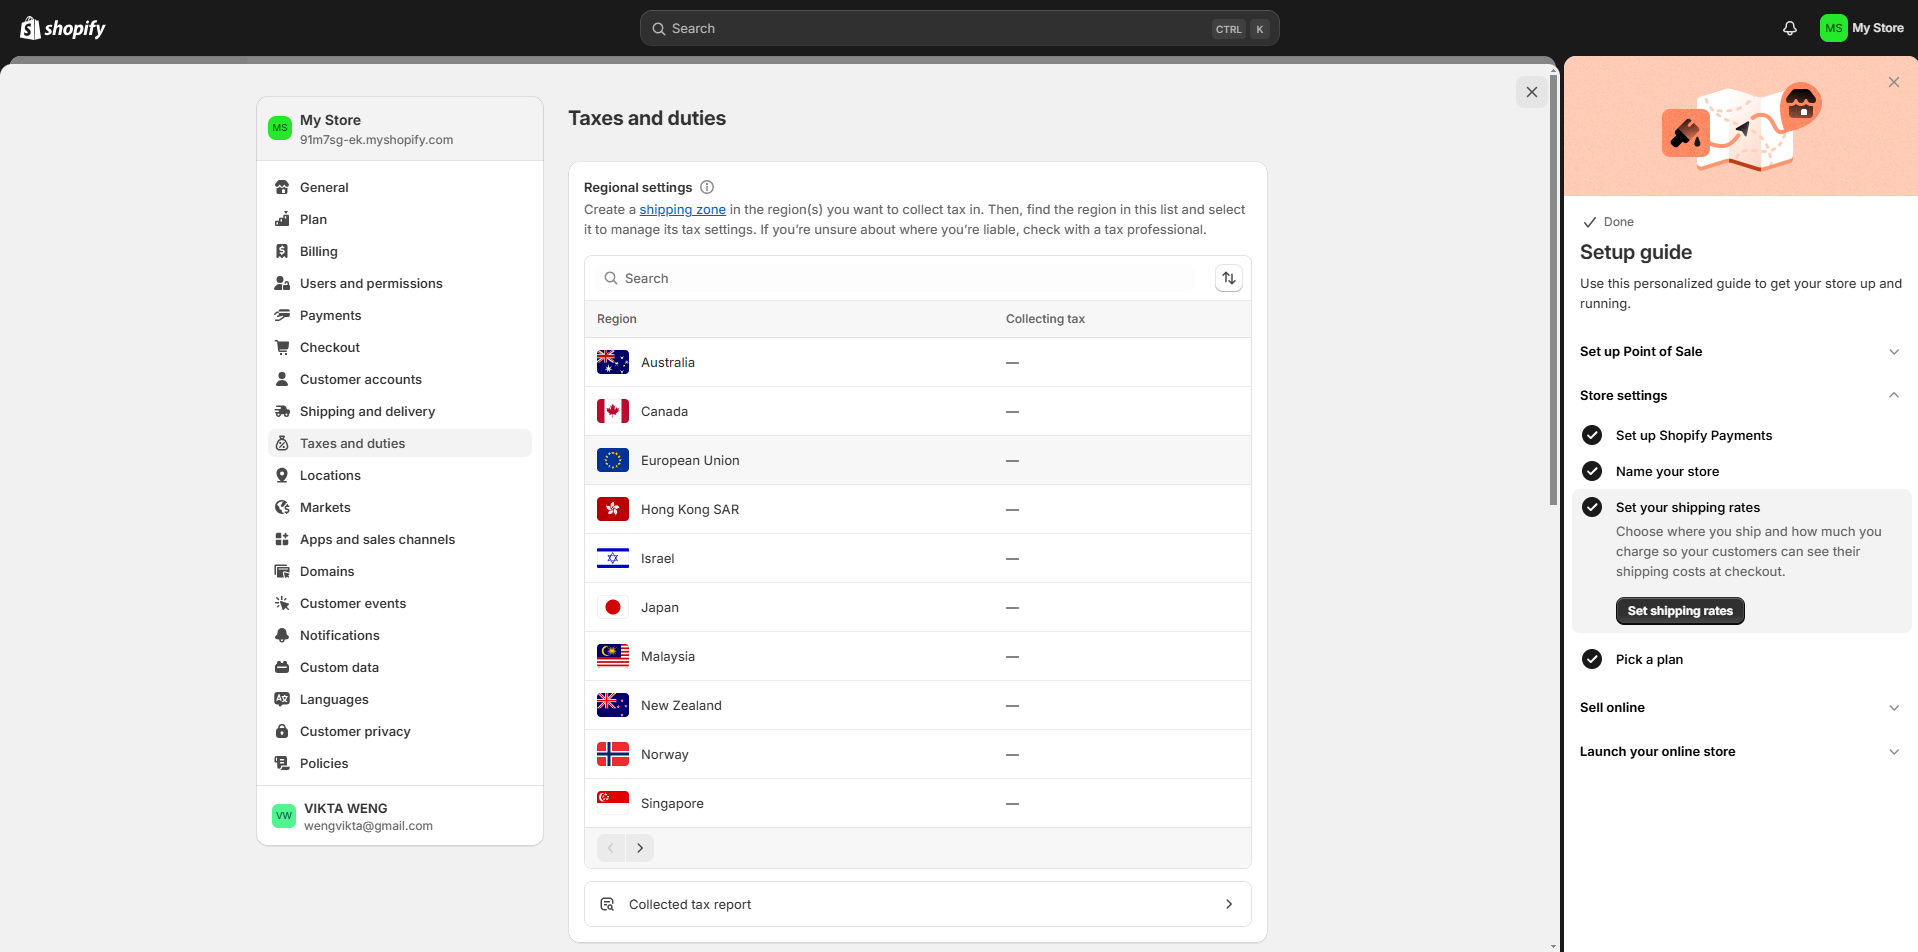
Before you begin setting up taxes in Shopify, you need to confirm whether you should charge taxes on your products. Consult with local tax authorities or a tax professional to ensure that you're following the correct tax regulations.Make sure you register and obtain your tax number. If you need to charge taxes, register with the relevant tax authorities in your country or region and obtain your tax number. Once you' ve got these legal issues solved, follow these steps:
- Access tax settings: From your Shopify admin, go to Settings > Taxes and duties.
- Select your country or region: In the Manage sales tax collection section, click on your country or region.
- Collect sales tax: Click Collect sales tax to set up tax collection for the selected country or region.
- Enter tax number: In the Tax number field, enter your tax number. If you haven’t received your tax number yet, you can leave this field blank and update it later.
- Confirm tax collection: Click Collect tax to confirm tax collection for the selected region.
- Add more regions (optional): If you need to set up taxes for additional regions or account numbers, click Collect sales tax again to add more regions.
- Manage tax settings: Once you’ve set up your tax regions, you can manage other tax settings, including tax overrides, exemptions and tax calculations. This allows you to ensure that you’re charging the correct tax rates wherever you sell.
Step 5: Shipping Setting
Set up Shipping rates is a very important step, as you need to be sure you're offering the best rates and shipping options for customers. To set up shipping rates on Shopify, go to Settings > Shipping and delivery and select the shipping profile you want to work with and click Manage.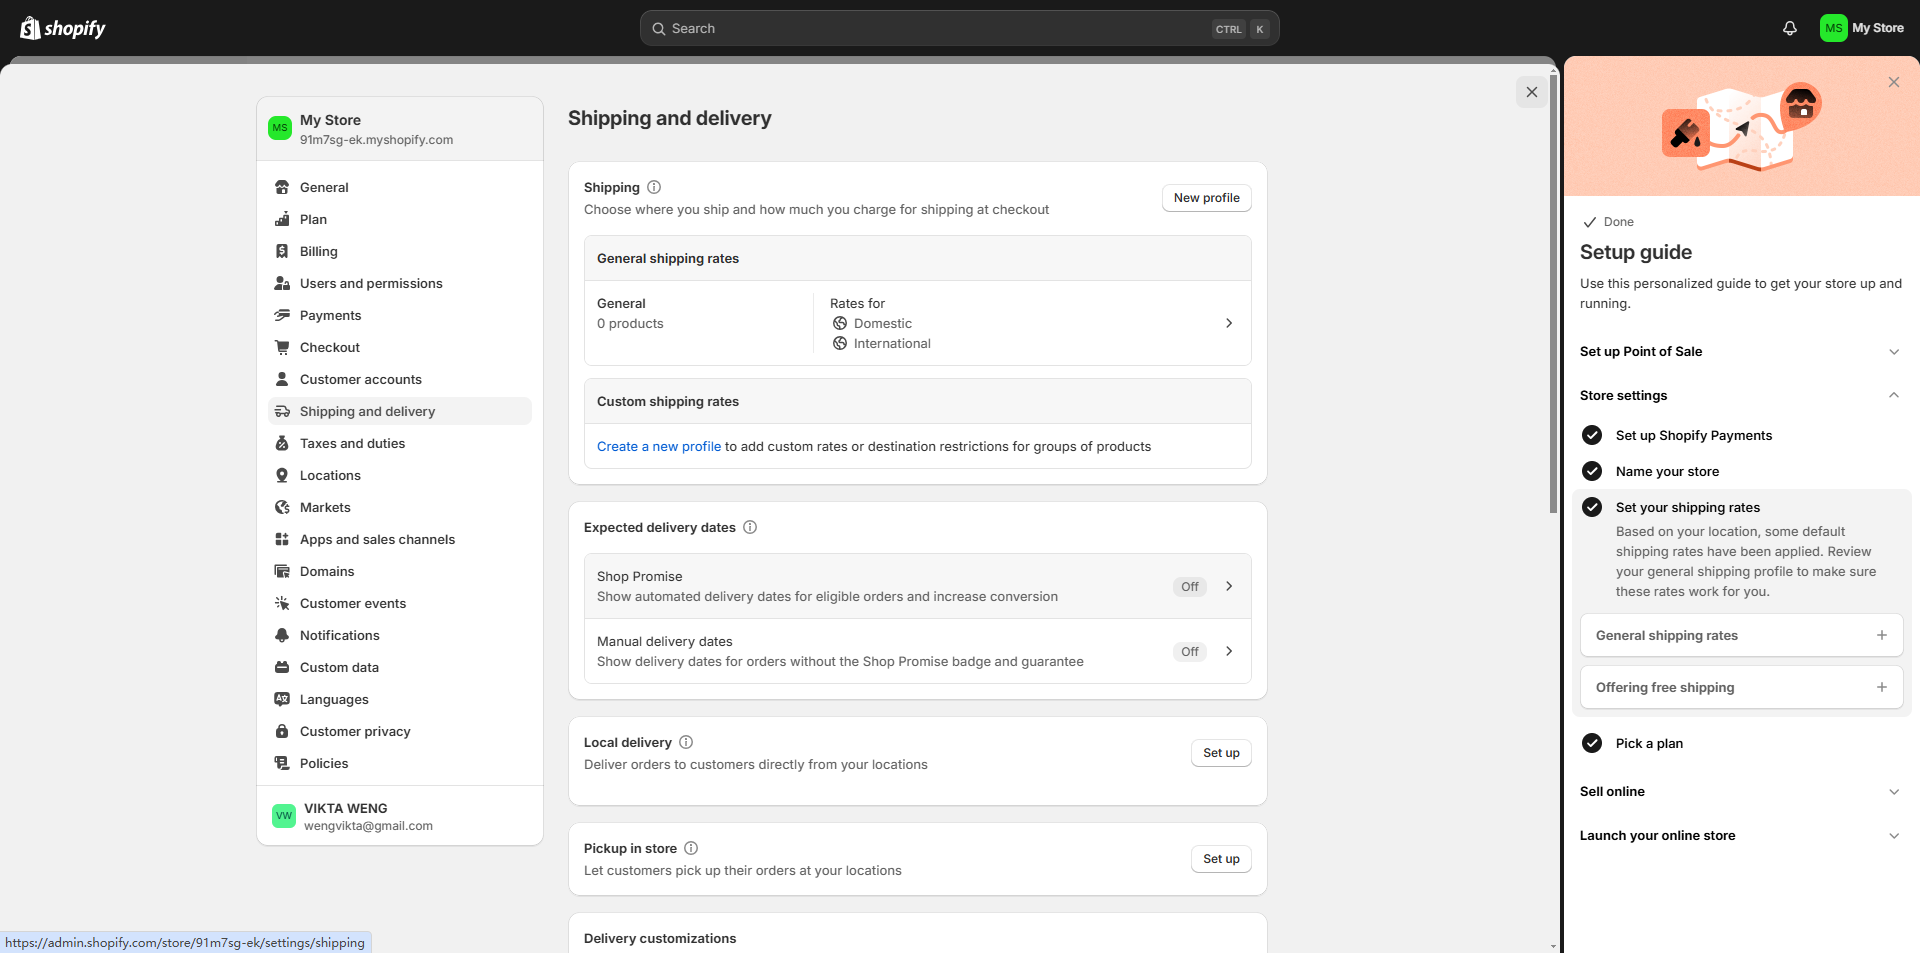
The detailed steps pls check below:
- Add shipping rate: Click Add rate and set rate details. Enter the name for the rate and the applicable shipping rate value (e.g., amount, currency, weight, etc.)
- Add conditions (optional): Depending on the type of rate, you can add weight-based, price-based, or other conditions to qualify for the shipping rate.
- Adjust calculated rates (optional): If using calculated rates, you can mark up or discount the rates to adjust what customers see at checkout.
- Save the rate: Click Done and then click Save to add the shipping rate.
- Set up local currency shipping rates (Shopify Payments only): If using Shopify Payments, you can offer flat shipping rates in local currencies for customers from different markets.
Step 6: Add Products to Shopify Store
In the homepage, Click the "Products" in your left side of the screen.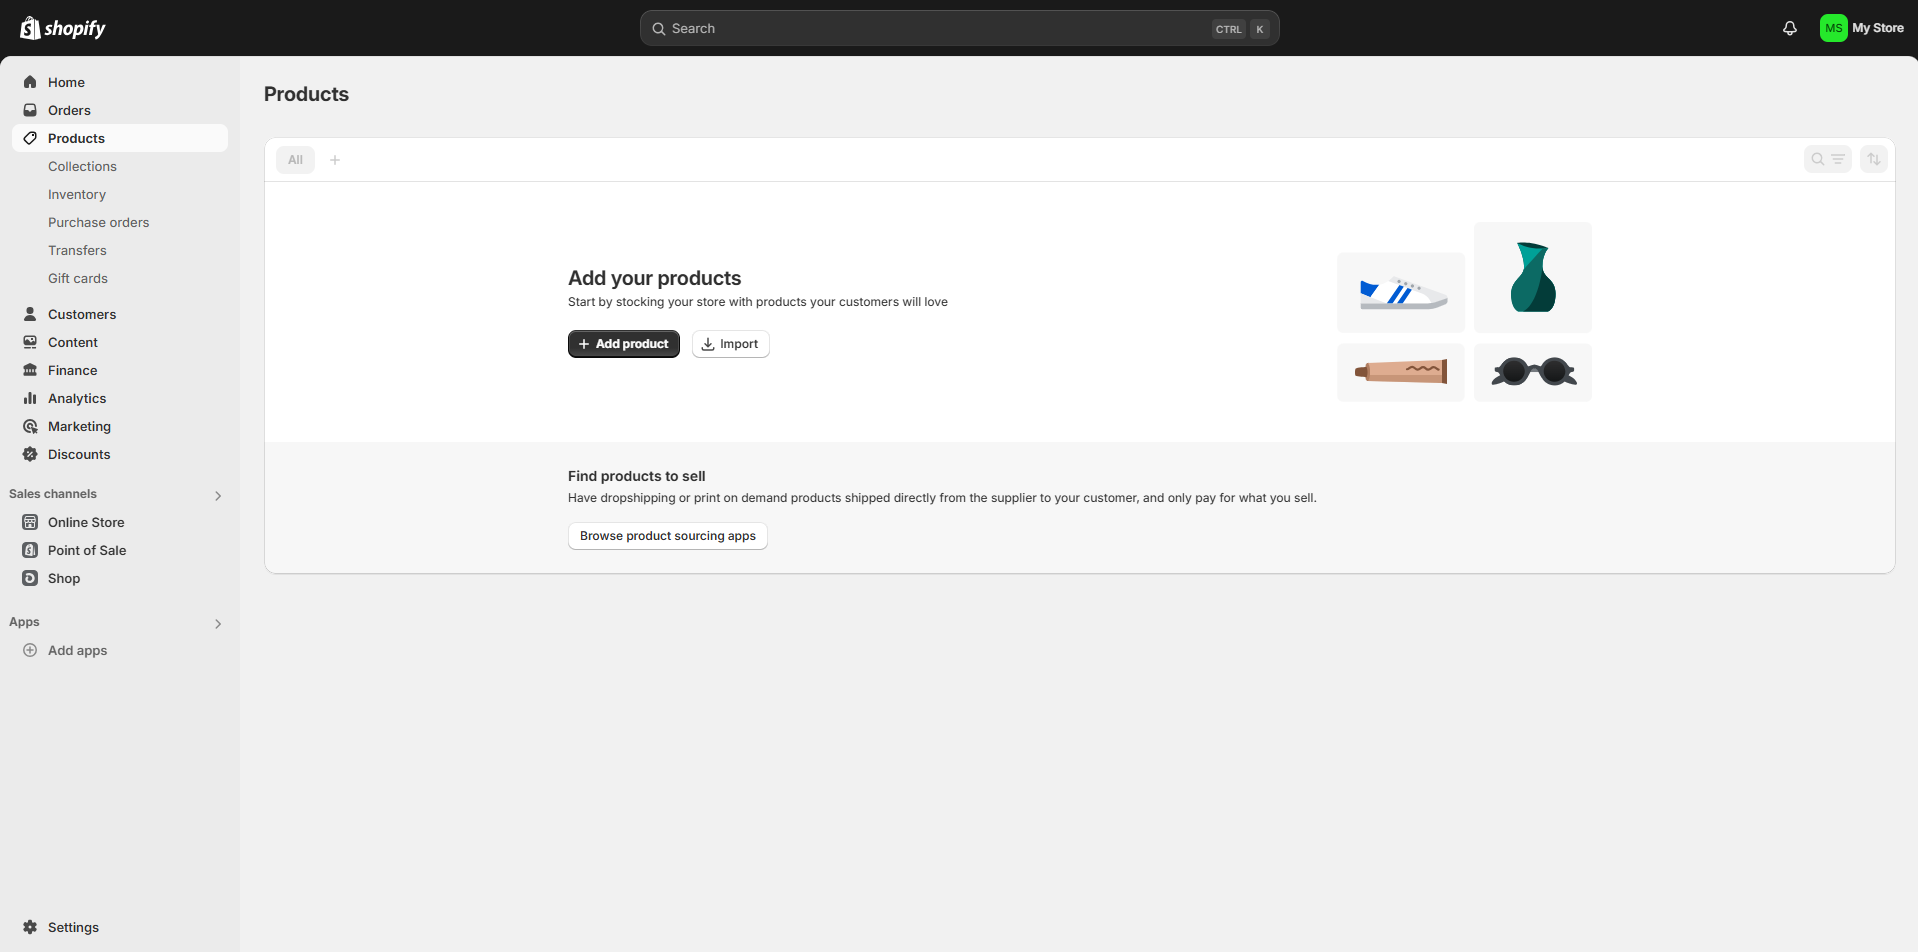
You will be brought to the product builder page where you can manually enter information for one product at a time. Fill in the product title, description, images, quantity, pricing, and any variations in color and size. Once all of your information is entered, click “Save” in the top right corner.
Listing optimization is another important aspect of selling on both Amazon and Shopify. You need to be sure to include relevant keywords, compelling descriptions, and high-quality images in order to increase your conversion rate.
If you do not know how to set up the product title and description, 4Seller can provide you free to use Listing Builder with AI Assist to help write your product listing. Once complete, you can simply publish your products' listings Shopify.
Step 7: Fulfill Shopify Orders
Unless you are using a 3PL or FBA to ship your orders, you will need to fulfill the orders for your customers yourself. 4Seller can support you fulfill shopify orders via Amazon FBA automatically. it will save you much time in selecting the logistics and processing orders. In 4Seller, you can set up logistics rules to fulfill Shopify orders automatically. Also 4Seller can provide the services with printing shipping labels, packing slips and picking list which you can cuztomized the print templates bu yourself. Above features in 4Seller is free to use!When an order is placed on your website, it will then go into your "Order" section and will be marked as Unfulfilled. Click on each order and you will see the products ordered, the custome's shipping information, and the ability to purchase and print a shipping label right in Shopify based on the shipping option they chose. Once the shipping label is purchased, you can mark the order as "Fulfilled"and ship the package to your customer!

The order and tracking information will be automatically sent to your customer. If you are using the drop shipping method on Shopify, you can use a dropshipping app to help fulfill your orders from suppliers.
10 Useful Strategies for increase your Shopify store sales for your business
1.Create discount and gift cards
Potential customers might visit your site but still considering buying or not. Help on-the-fence shoppers decide to buy with an incentive. Named Discounts in the Shopify admin, you can choose from the following coupon code types:- Amount off products
- Buy X, get Y
- Amount off order
- Free shipping
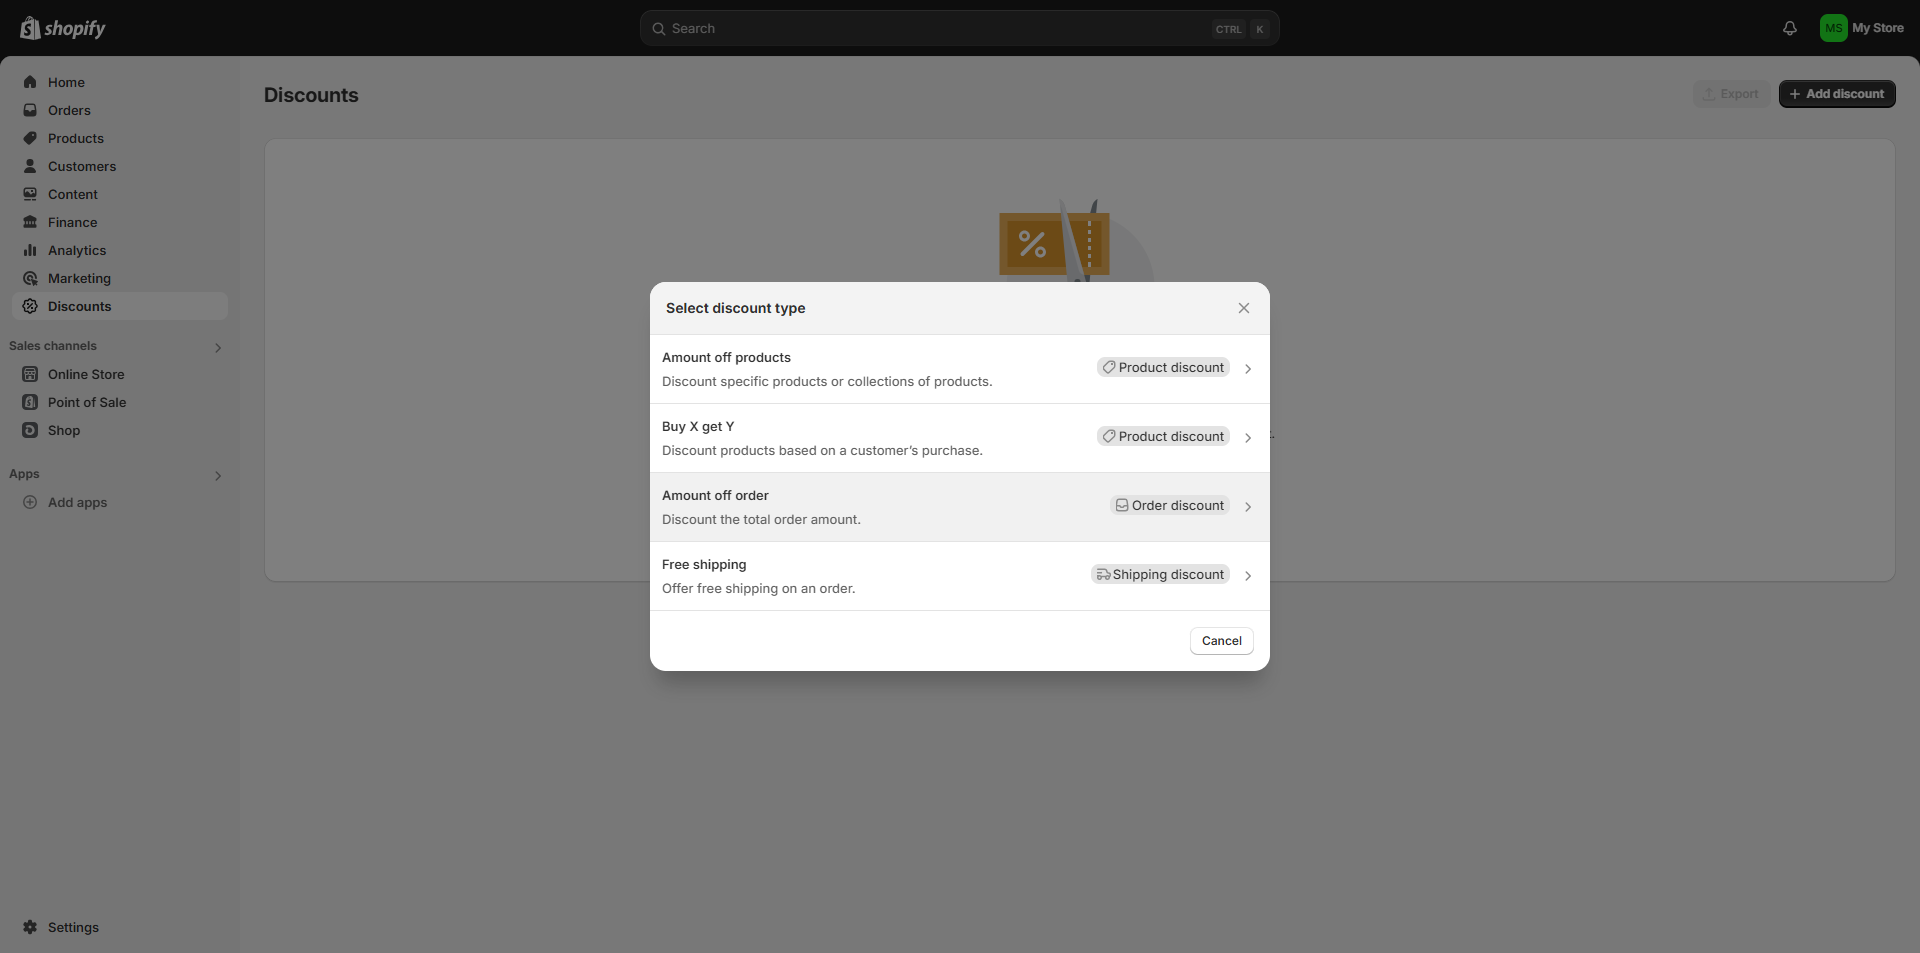
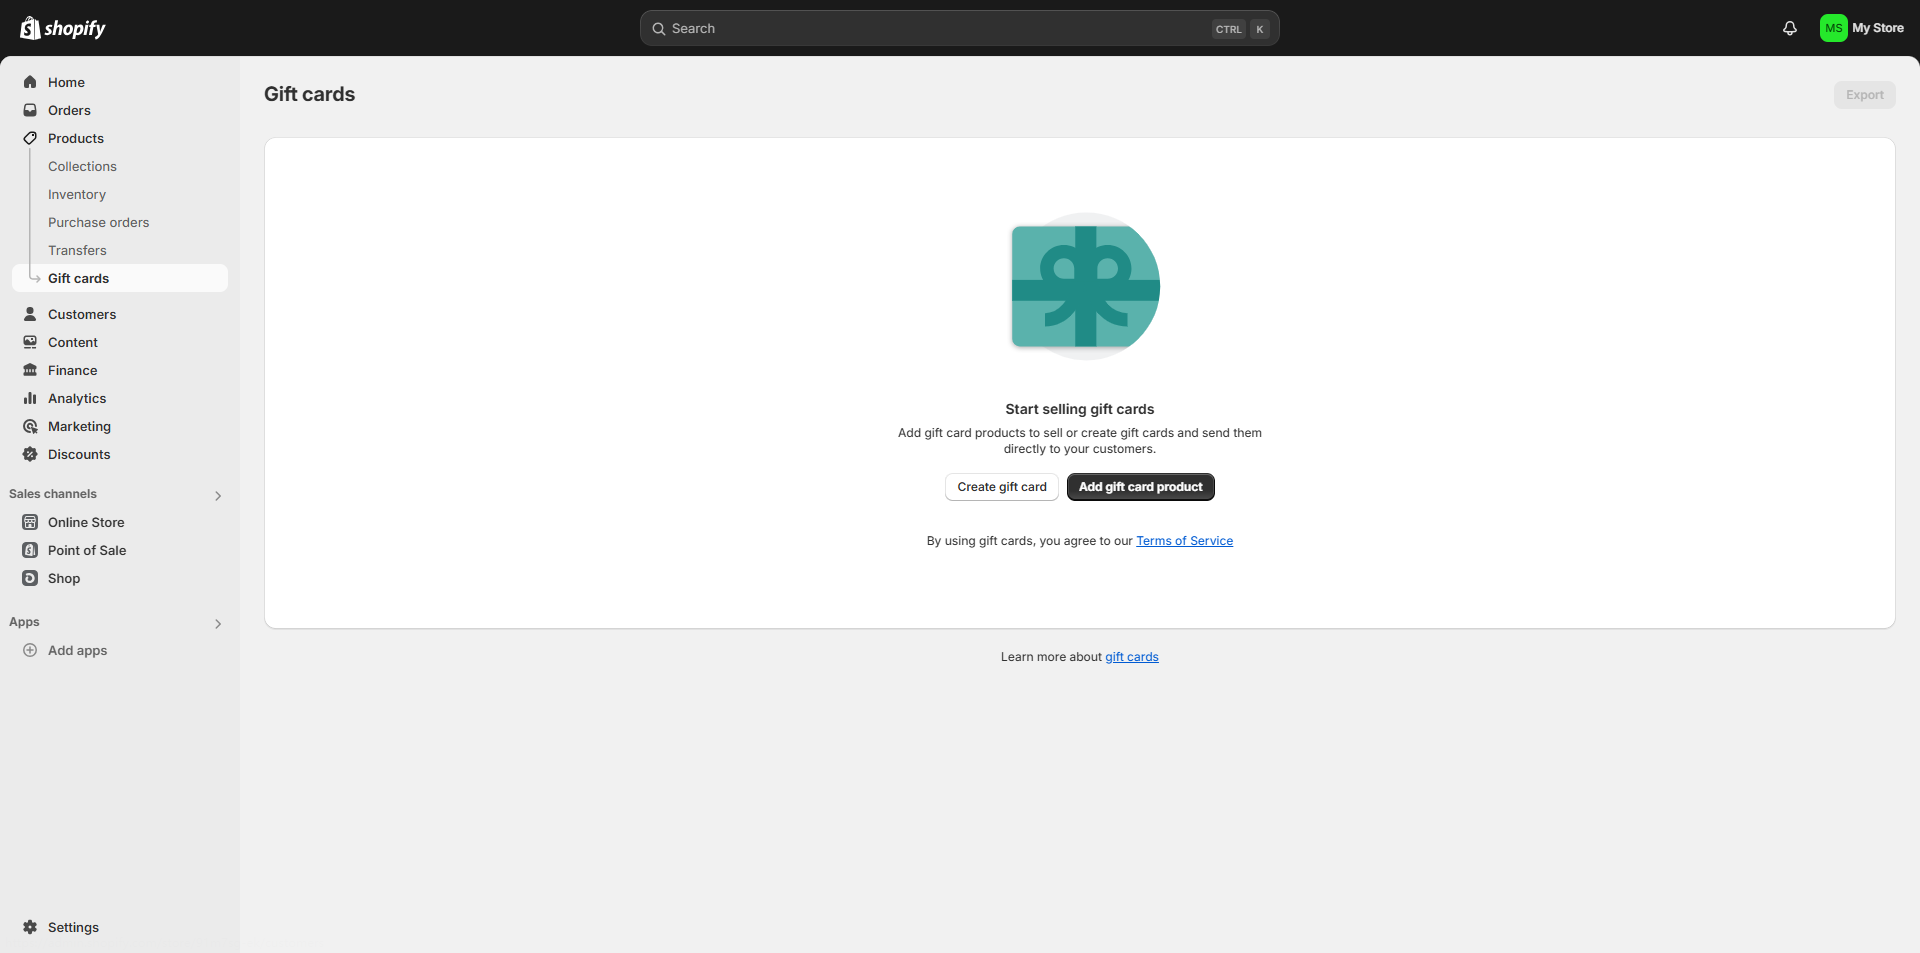
Discounts work best when combined with email or text message marketing. It's a win-win for everyone involved: potential customers get a discount, and you get their email address or phone number for future retargeting. You can also create Shopify gift cards for people who are buying gifts but aren't sure what the recipient wants. Go to the Gift Card tab (under Products) and select Add Gift Card Products. Name the new gift card and choose the denomination you want to offer.
2.Share customer Reviews
Did you know 93% of customers actively seek reviews before buying a new product or service? Reach out to satisfied customers and ask them to leave a review on your Google Business, Yelp, or TrustPilot listing. Share these reviews through the following channels to attract more customers:
- Email marketing campaigns
- Social media platforms
- Product pages
3.Advertise Your Shopify Store
Social media is a great way to market and showcase your products to the world—one in three U.S. consumers starts their product search on social media channels like Facebook and YouTube, and more than half have purchased a product they found through social media.
Even TikTok is now responsible for driving traffic and sales for many products. Work hard to build a loyal following and create share-worthy content, and remember to include your Shopify store URL in your bio so customers can easily shop your brand.
4.Use upsells and cross-sells
Potential customers often visit product pages that don't exactly match their preferences. Use the following marketing strategies to encourage these individuals to make a purchase:
- Upsell: recommend products that are more expensive than the ones they are currently viewing.
- Cross-sell: Recommend products that complement those already in the shopping carts of existing site visitors.
For example, if someone is looking at a $19 iPhone case, upsell and recommend a $39 case with drop protection. Use the matching $4.99 PopSocket to cross-sell and increase average order value.
5.Add trust signals to your Shopify store
New customers often need help to trust unfamiliar websites. Prove that they should trust your online store with sensitive information—and increase sales—by displaying trust signals like:- Money-back guarantees
- Customer reviews
- Return/refund policies
- SSL certificates
- Logos of credit card processors
6. Offer Free Shipping
No matter what products you sell, shipping costs can hurt your online sales. Modern shoppers expect free shipping on all online orders, and 47% of shoppers will abandon their carts if the extra costs, such as shipping, are too high. Meet these customer expectations by running marketing promotions centered around free shipping offers. Increase average order value by asking customers to spend a certain amount of money to qualify for free shipping.
7. Run abandoned cart email campaigns
People may see a product they're interested in on your online store, only to exit without buying. Customers abandon their carts for various reasons, from unclear pricing to getting distracted and forgetting to return. Use cart abandonment emails to remind people they added an item to their basket but didn't buy. Give them a reason to buy now (like an additional discount) rather than later.
8.Launch flash sale
Flash sales are similar to promotions, but with stricter time constraints. The concept of “flash sales” means that customers must buy before the sale ends. Studies have shown that this sense of urgency induces online shoppers to make a purchase.
To make a flash sale:
- Make sure you have enough inventory to meet demand
- Set specific start and end dates
- Make your marketing messages consistent, e.g. offer the same discount on every marketing channel and website banner
- Launch flash sales carefully (if customers know there will be another flash sale next month, they may not buy)
9.Display the clear return policy
It sounds counterintuitive to tell people how to return a product before they buy it, but it's crucial to increasing sales. One study found that return policies influence 82% of purchasing decisions, and many online shoppers inquire about return policies before placing their first order.
Highlight important information in the return policy, such as:
- How long it takes for someone to initiate a return
- What can (or cannot) be returned
- Whether returns are free or require an additional fee
Display this information in microtext such as in the footer of your website, checkout information, or below product descriptions to give hesitant customers the confidence to make a purchase.
10. Use Price Anchoring
Price anchoring is a sales technique that compares the old price to the new price. If you're selling a product for $49, but lower the price to $39, you should cross out the "befor" price to show your customers how much of a discount they're getting.
Before using this tactic, note that the "before"price must be the actual sale price. If you inflate the initial price of a product to mislead customers into thinking the deal is a better deal than it really is, you could get into trouble.
Conclusion
Shopify is an eCommerce platform that allows anyone to sell online. Shopify dominates the eCommerce market because it can manage the end-to-end process of starting an eCommerce business, so you won't need a mix-match of apps or tools to handle each aspect. Therefore, if you would like to know how to create a new shopify store from 0-1, this blog will help you a lot! Furthermore, after you create the shopify store, 4Seller can help u in listings' publishing, inventory, order management! Join in E-commece world and improve your business then gain more money!
